The holiday season has been pretty busy with non-trailer work. And some play. But I have continued to make some progress.
We had visitors over Thanksgiving, so my wife and I turned the house over to visitors and slept (and took showers) in the trailer. So the couple weeks before that were busy with plumbing. I got the water heater and furnace plumbed and wired. I put in the refrigerator, but when I got it connected I found there was an internal propane leak. Given how old it was I discarded it and bought a new pastel-green 100 volt dorm refrigerator. These are efficient enough that I think we can risk the battery power. I’m not including photos of the new refrigerator because I still have to do the trim.
Over the bed I added a little shelf. See top right of this picture.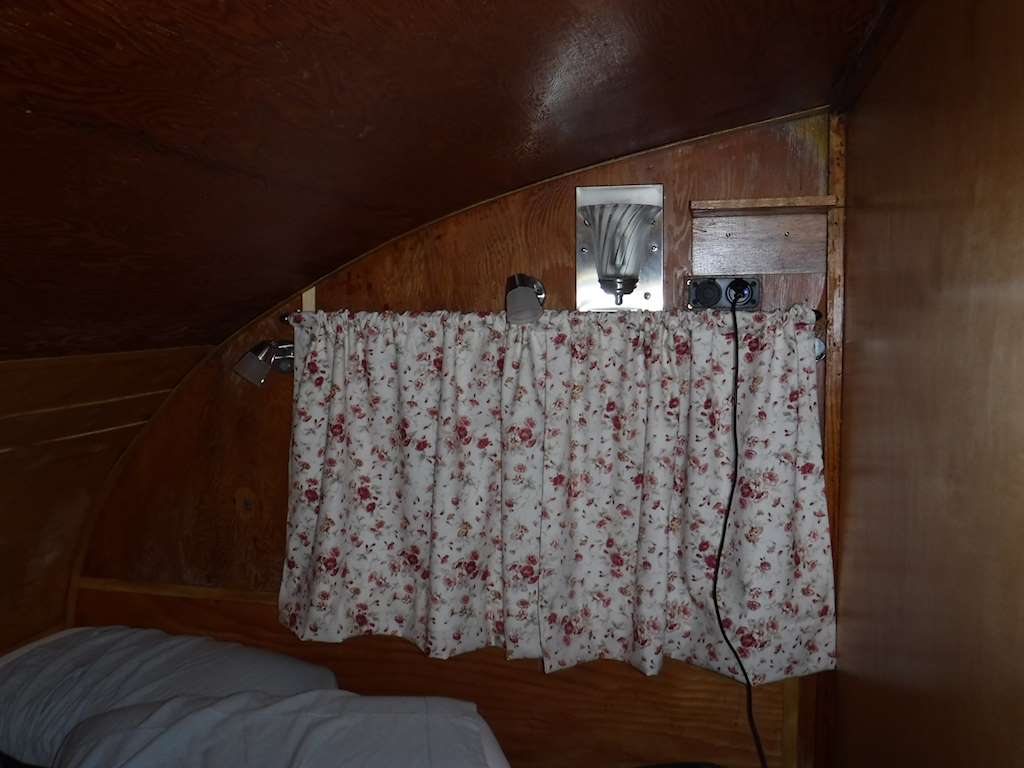
My wife likes to listen to meditation videos or audios to help her fall asleep. This way she can plug her phone or tablet into the charger you can see, and put it on the shelf. The charger or tablet is charged, and the earbud wires are as out-of-the-way as they can reasonably be.
I did some testing on the refrigerator. For a fraction of a second it hits about 800 watts, then settles down to 80 or below. I couldn’t find a 300 or 400 watt true sine wave inverter that will produce that much power, so I got a 600 watt AIMS inverter. I also got a 45 amp power converter. The Progressive Dynamics PD9245CV seems to have appropriate specs and a good reputation, so I got one of those. Here’s how I set up the wiring:
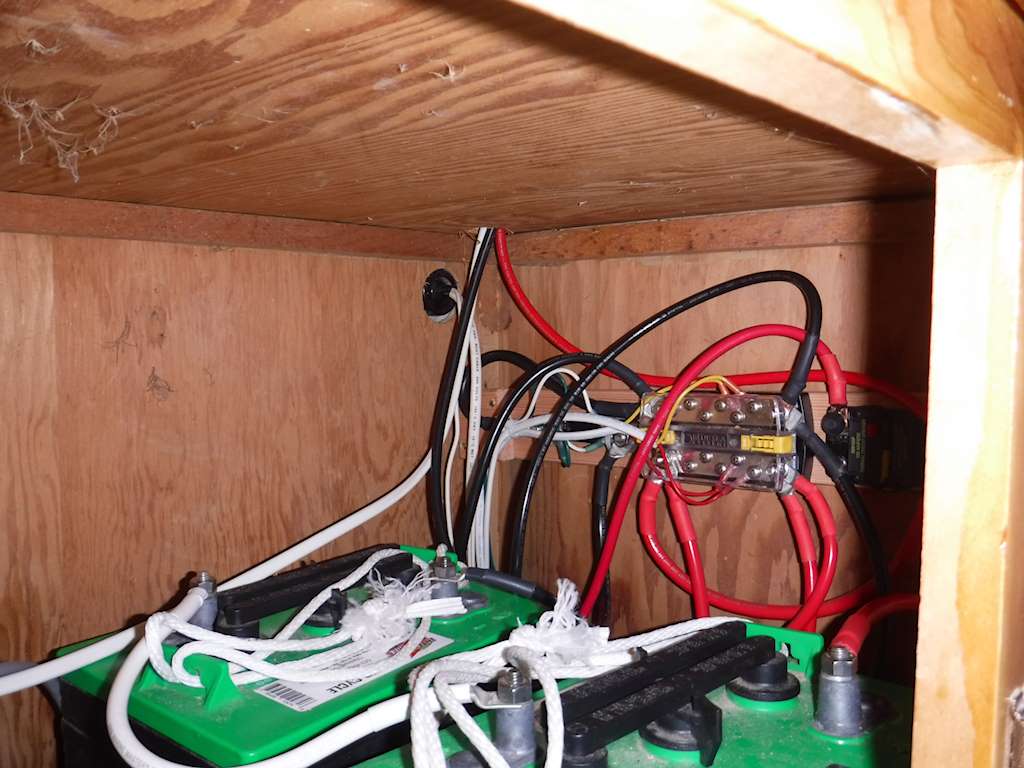
12 Volt
Wiring comes from the batteries to a 100 amp main power busbar, with a measurement busbar on the negative lead. From the measurement busbar leads go to two 12 energy meter. They measure voltage, current, watts, and total watt-hours. One is wired to measure discharge out of the battery, and one is wired to measure charging into the battery.
Two main leads come out of the battery. One goes through a 100 amp circuit breaker to the distribution panel. One goes through another 100 amp circuit breaker to the inverter.
Here’s the wiring inside the battery compartment. From the left it’s the measurement busbar, power busbar, and circuit breaker for the inverter: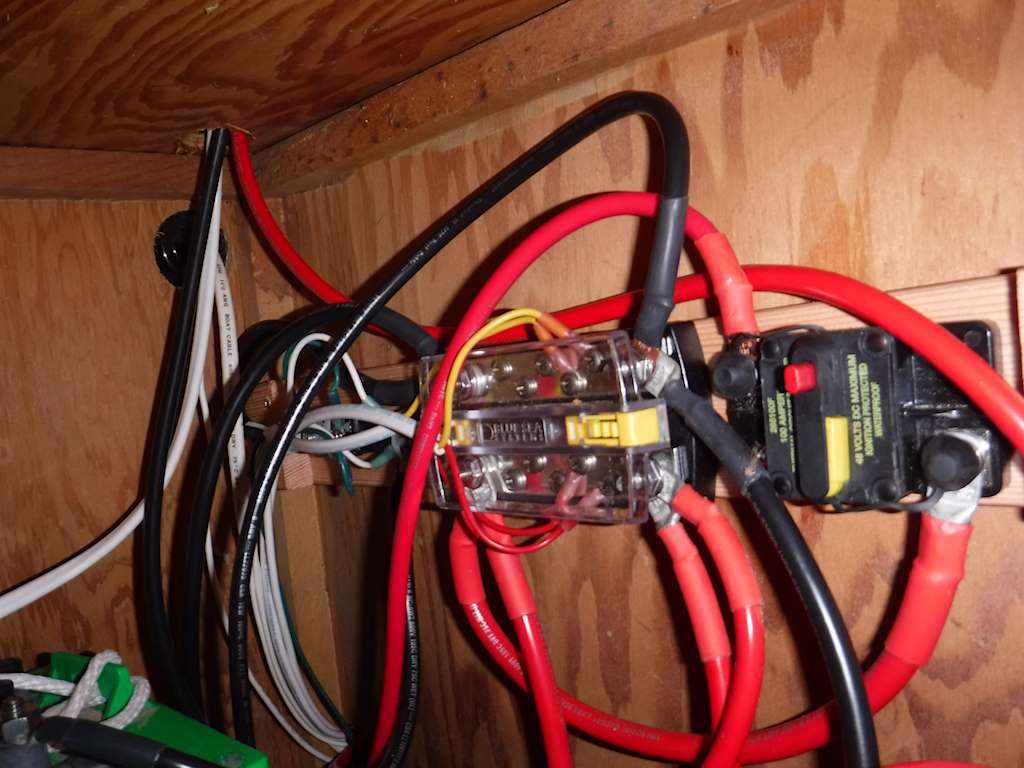
And here’s the power converter, inverter, meters, and the 110 volt wiring.
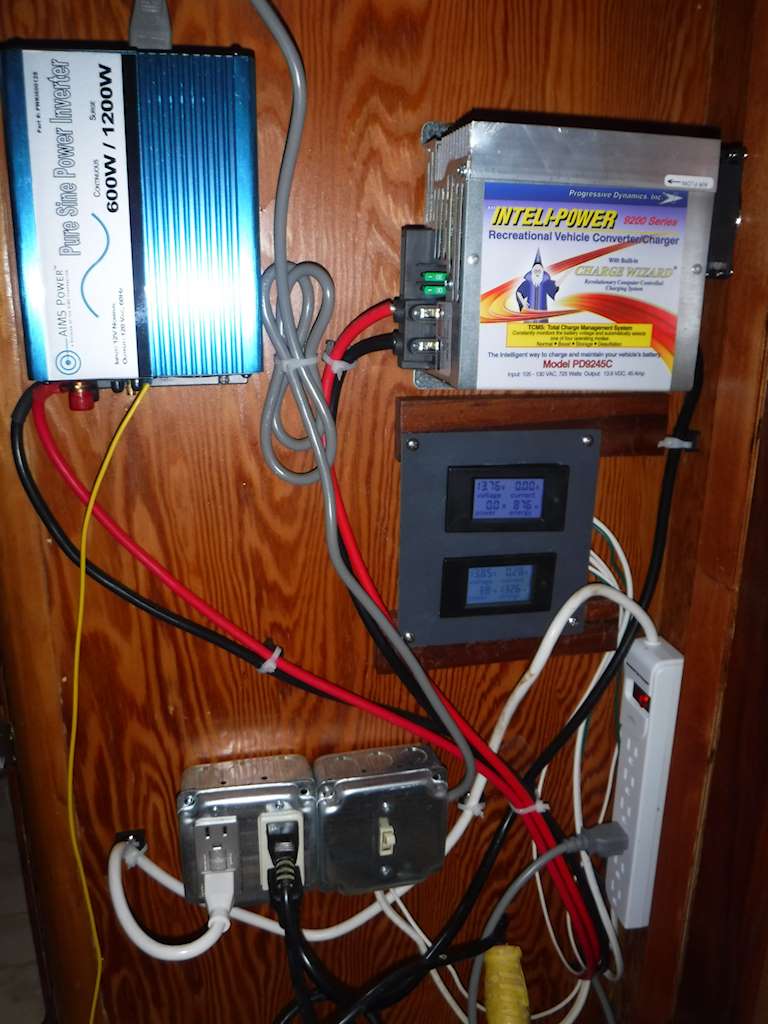 It’s all extremely out in the open, but it sort of has to be. Because the power converter and inverter can generate heat, it’s not a good idea to put them inside a cabinet.
110 Volt
Shore power comes into the trailer into the battery compartment and to the cabinet back panel through the white wires at the bottom of the image above. Inside the two electrical boxes it connects to the right of the two duplex outlets, and to the switch. The switch is what is sold as a 3-way switch in the hardware stores, although it’s actually a single-pole double throw. That controls the left duplex outlet. With the switch in the upper position, the duplex outlet runs off shore power and the inverter can (and should be) turned off. With the switch in the lower position the 110 power comes from the inverter. That way the refrigerator cord (the gray line into the power strip) and everything else can be left plugged in. When changing between shore and battery power we just need flip that switch and the inverter switch.
I made a Wiring Diagram for the convenience of whoever needs to fix something. I will add some labels to the switches and meters.
The shower was not yet usable because I didn’t have a shower pan. I got some fairly heavy PVC and tried to heat-form the piece to make a shower pan out of that. I was not able to get anything usable, so I went back to something I have experience with- fiberglass. Normally I use epoxy, but I was almost out of epoxy and time was short. I was able to get some polyester resin that claims to be waterproof, so I lined the bottom of the bathroom with 4 mil polyethelene and laid up a polyester shower pan. The bottom is two layers of matt and four layers of cloth with excess resin, so it should be very waterproof. It still needs work. There are still some sharp edges to be cleaned up, and it’s not flat enough. Some water stays near the drain. I’ll need to get more epoxy and micoballoons (for the easy sanding), and that should be fairly easy to fix.
I also put back the U-shaped shower curtain rod. A standard shower curtain and liner is the right size horizontally but too tall, so I sewed that to the right length. I also need to put in the corner molding. I added towel hooks on the right side, toilet paper holder on the left, and a rack in the shower. I had a Coleman porta-potti, but the pump broke and I couldn’t find replacement parts. So I got a Thetford. I think it’s a bit better made and they sell parts. Here’s what the bathroom looks like now, with the curtain pulled aside.
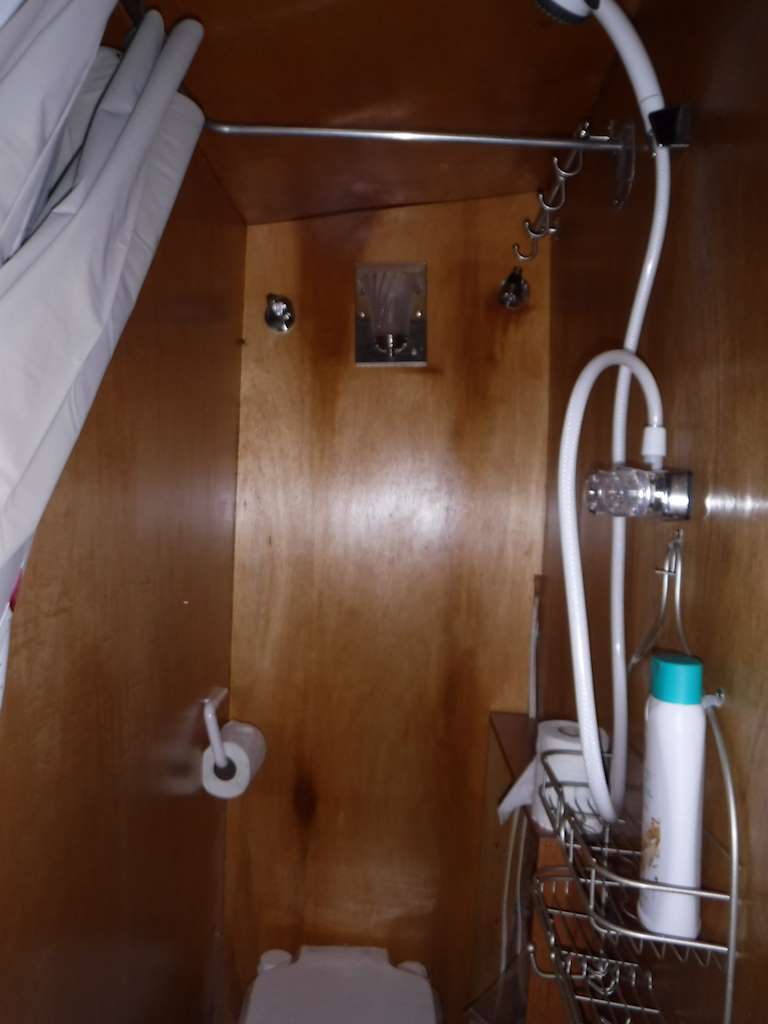
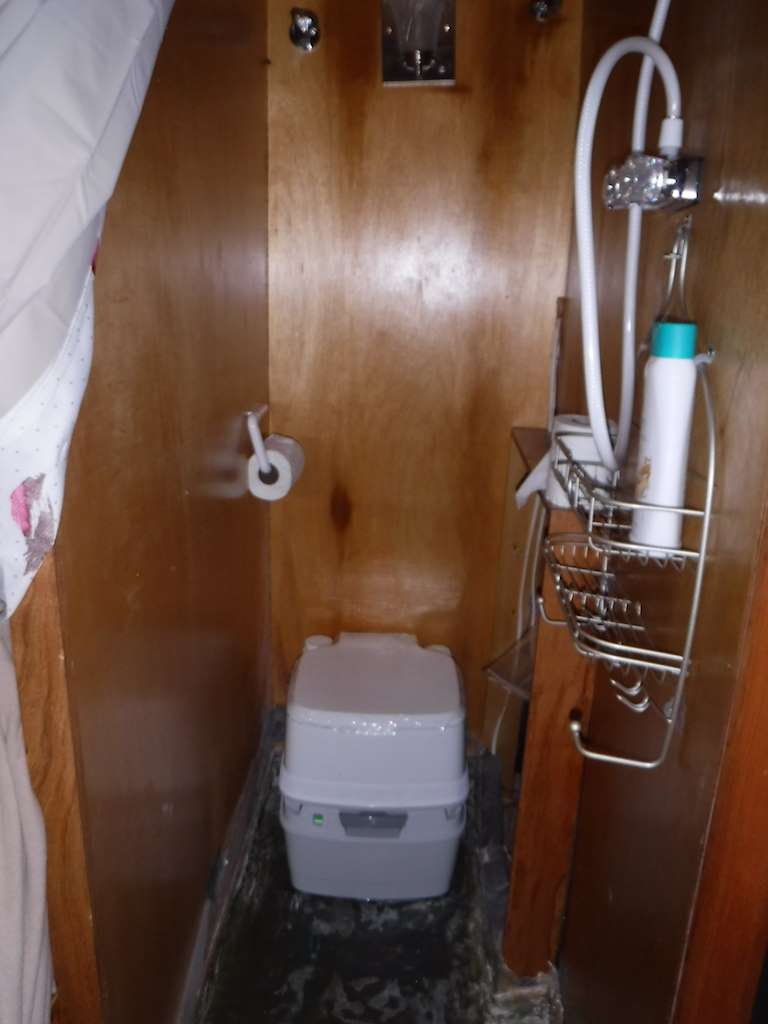
It’s borderline claustrophobic, but I was able to shower and get clean Everything works.
More work to come.