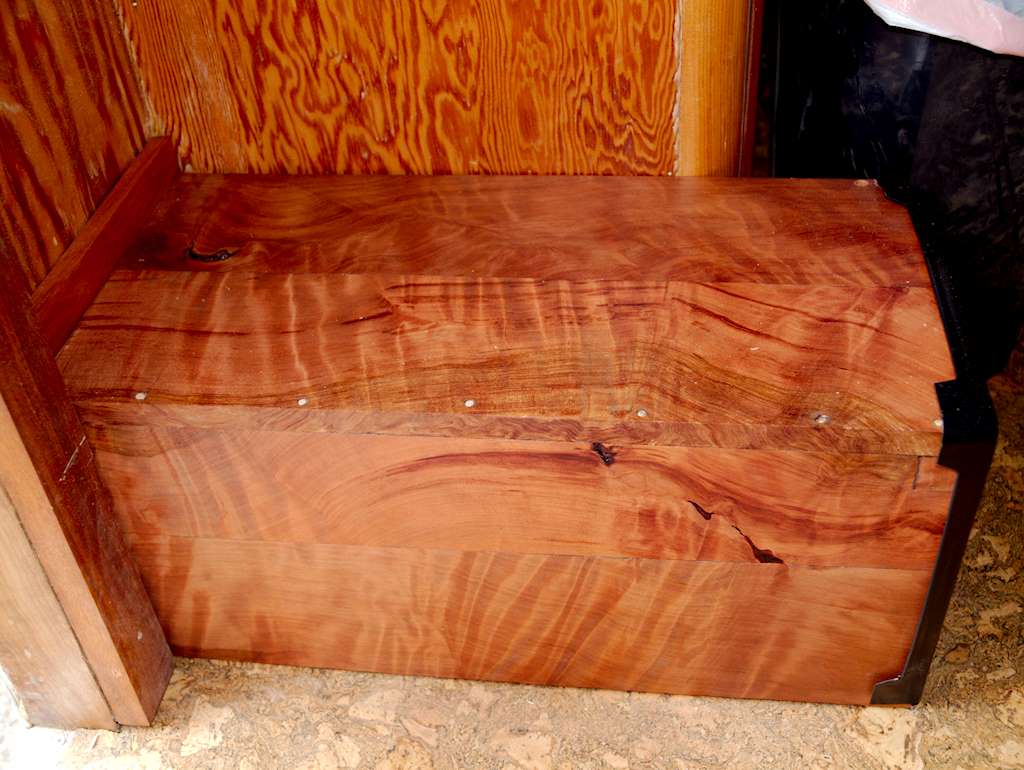
Today was a big day. I completed the floors. I had to pull the furnace to do that, and I replaced it. I built a housing for it. Now it looks like this:
 I love that curly redwood. This is just inside the front door, on the left. I’ve been working on the solar charging system. I got two 260 watt solar panels. I made a support structure out of aluminum angle. In operation they look like this:
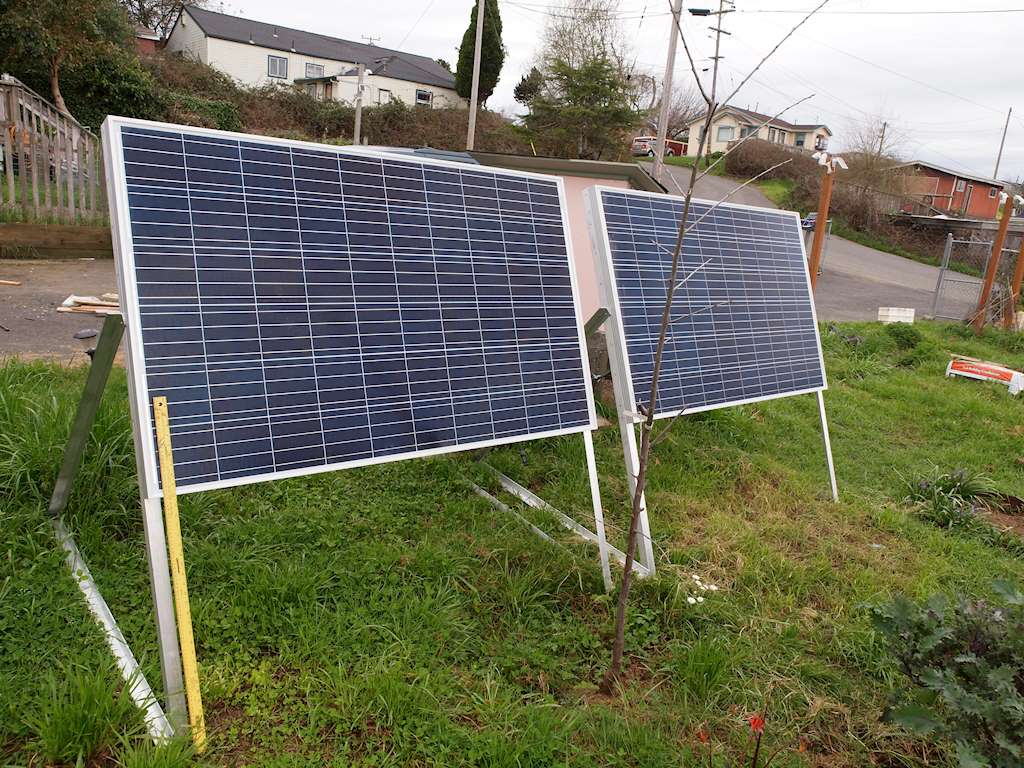 That’s a yardstick, for scale. The support uses three lengths of angle on each side of each panel. The longest piece is about 54 inches- just enough to fit through the front door.
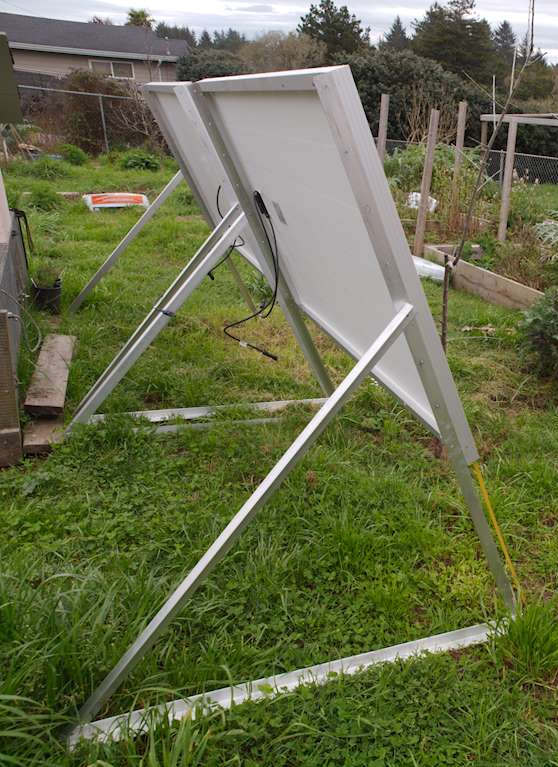
By changing which holes the rear vertical support the screws go in I can change the angle to get optimum depending on where I am and when during the year. More vertical for winter and farther north, flatter for summer and farther south. I’m still working on how I’m going to support it for travel.
I got an MPPT controller. That’s more expensive, but uses the panels more efficiently to maximize power. It also give me more flexibility on the panels. Maximum power rating is a bit over 7 amps at a bit under 40 volts. That lets me use 50 feet of 10 gauge wire and lose hardly any power. I need to have flexibility in where I put the panels, because they need to be out of the shade as much as possible. If I used a standard PWM controller that runs around 14 volts, I’d need something closer to 2 gauge. That gets heavy and expensive.
Also, there wasn’t a place to put the solar charge controller. All the electrical equipment was on the back of the right-side cabinet, just inside the rear door. That’s on quarter inch thick. I had put in a couple backing supports, but it wasn’t enough. So I took everything off, got a piece of half inch plywood, and attached it to the structure of the cabinet. Then I had more flexibility. Here’s what it looks like now: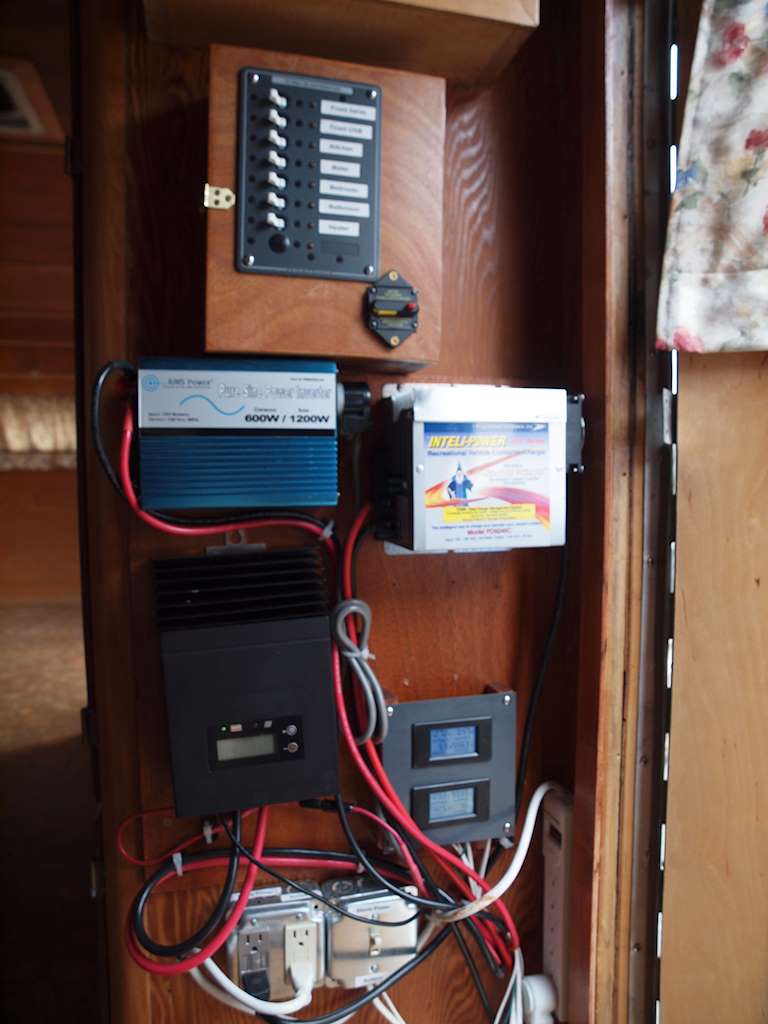
Top: Breaker Panel for internal wiring and lights. Second row down: Inverter on left, 110 Volt Power Converter/Charger on right. Third row: Solar MPPT charge controller on left, amp/volts/watt-hour meters- one for charge and one for discharge. Bottom row: 110 volt outlets. Two are connected the the power converter, and one is switched. When we have access to 110, leave the inverter off and turn the switch up. Then everything is running on shore power and the battery is fast charged. When boondocking, plug in the solar panel, turn on the inverter, and turn the switch down. Now we are self contained, and if there’s any decent sun we should be able to run the refrigerator without limits.
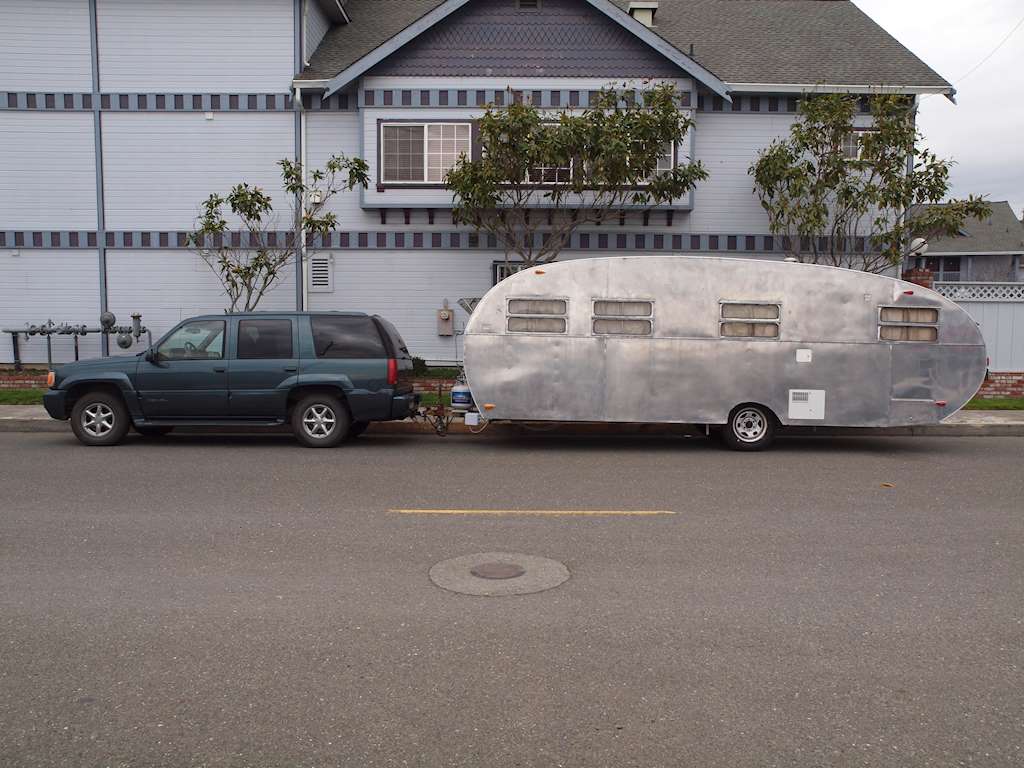
I’m finally ready to take it to my local RV repair center. They are going to repack the bearings and give me a general safety inspection. It has the very old brakes, and I hope I don’t have to replace them. If I do, I do. I don’t take shortcuts on safety. I had a bad connection for the right turn light wire, so I had to pull the lower back panel off again. This time I made sure all the connections were underneath the trailer, so if there’s ever another problem I can fix it. It’s been up on blocks for at least eight months. It’s nice to have it back on its own wheels.