Nov 23, 2015

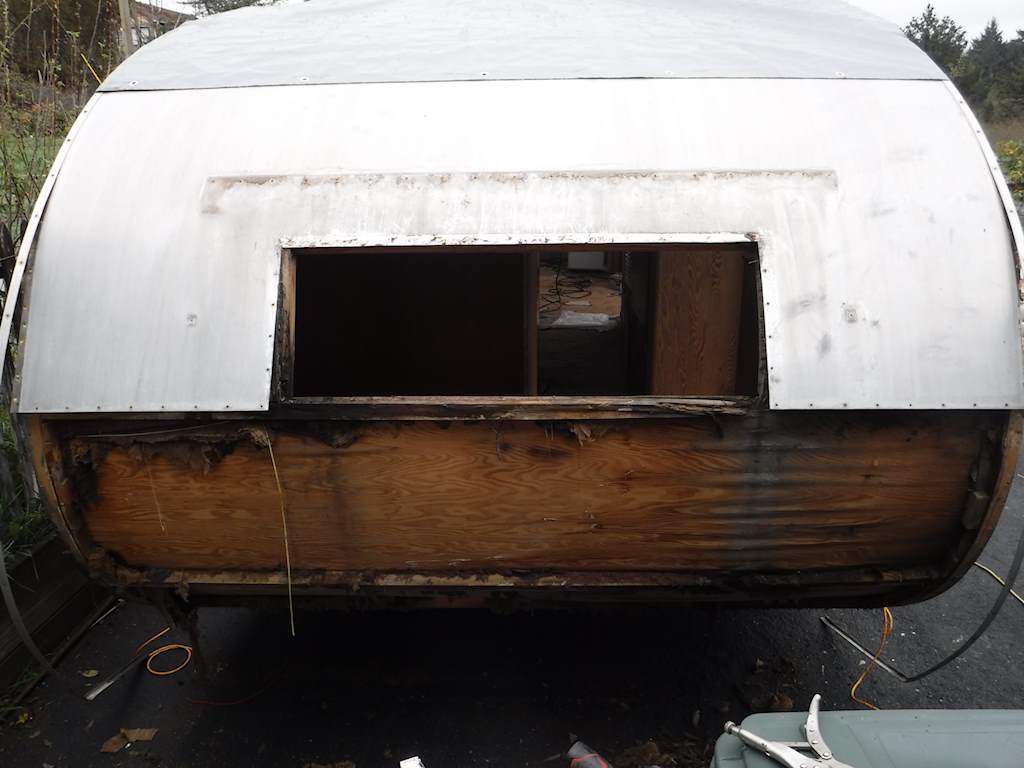
Today I finished the screws on the roof.  Removed the two roof vents and the corner molding. I left all the nails in place.  Nails. Seems they nailed each piece in place except the last overlap or layer.

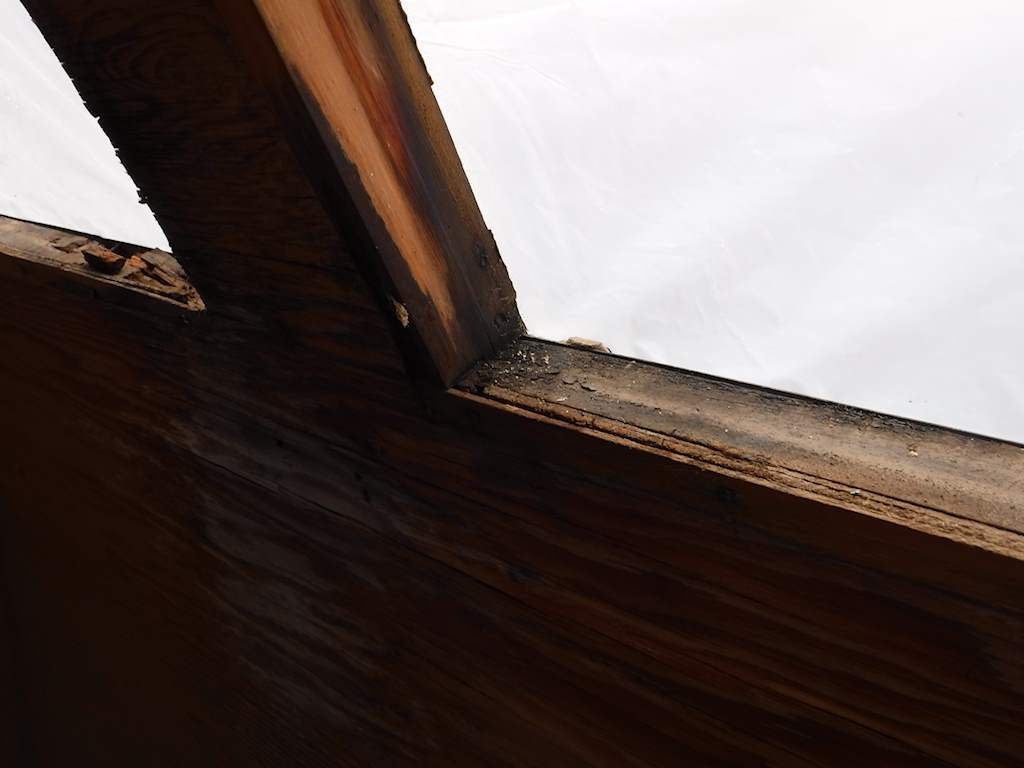
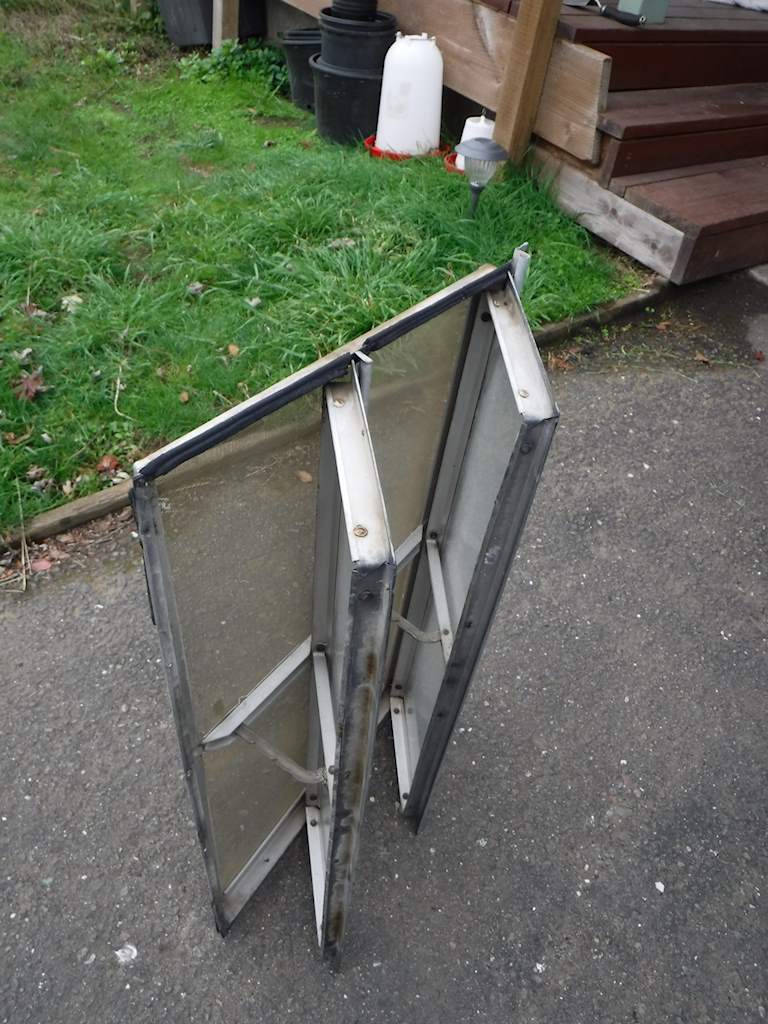
The right side, where the doors are, has a 1 x 1/2 inch unequal angle covering the corner joint and an extrusion (I don’t know how to describe the cross-section) above that to make the water flow off the ends and not over the doors.

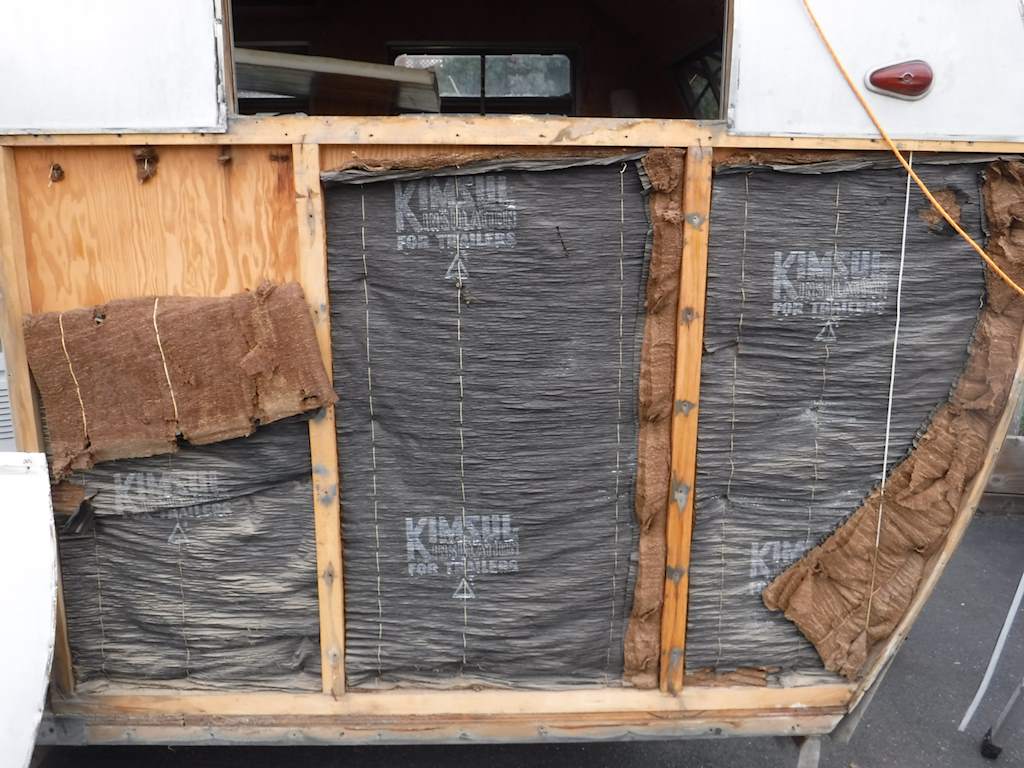
The left side has just the angle. Mostly every overlap has this stuff between, except that some of the roof panels are just metal-to-metal.  Crazy- those are the most important joints and they are guaranteed to leak.

DSCF0198

DSCF0203

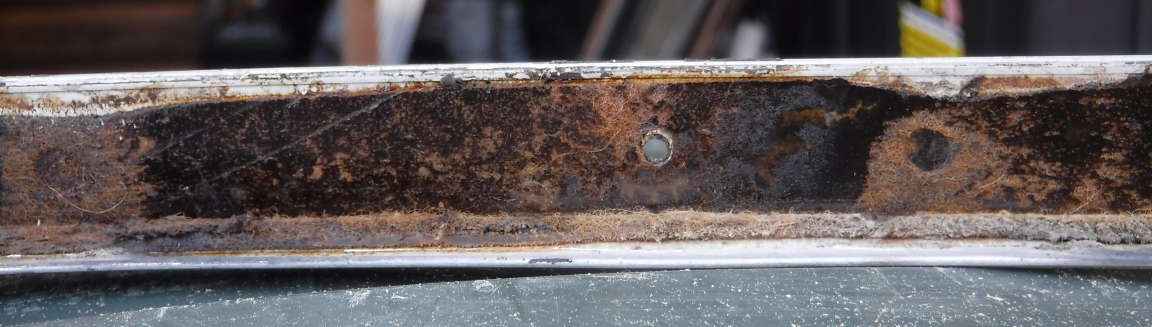
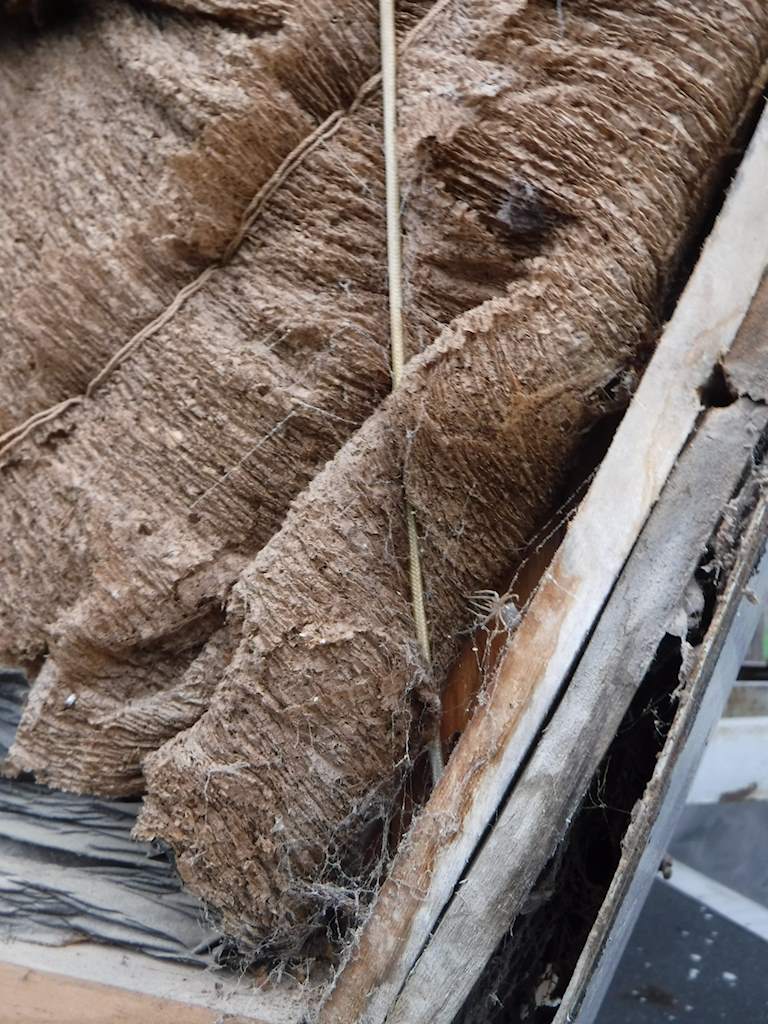
I’ve never worked on roofs, but it looks like I imagine tar-impregnated roofing felt would look. It acts more like an adhesive than a sealant. In the second picture above we’re looking at the inside of the one-inch-wide leg of the corner angle. Even after 65 years I had to pry it apart. If I’m right and that’s tar, then at least alchohol should remove it.  Would be nice if I can get it off without using any nasty solvents.

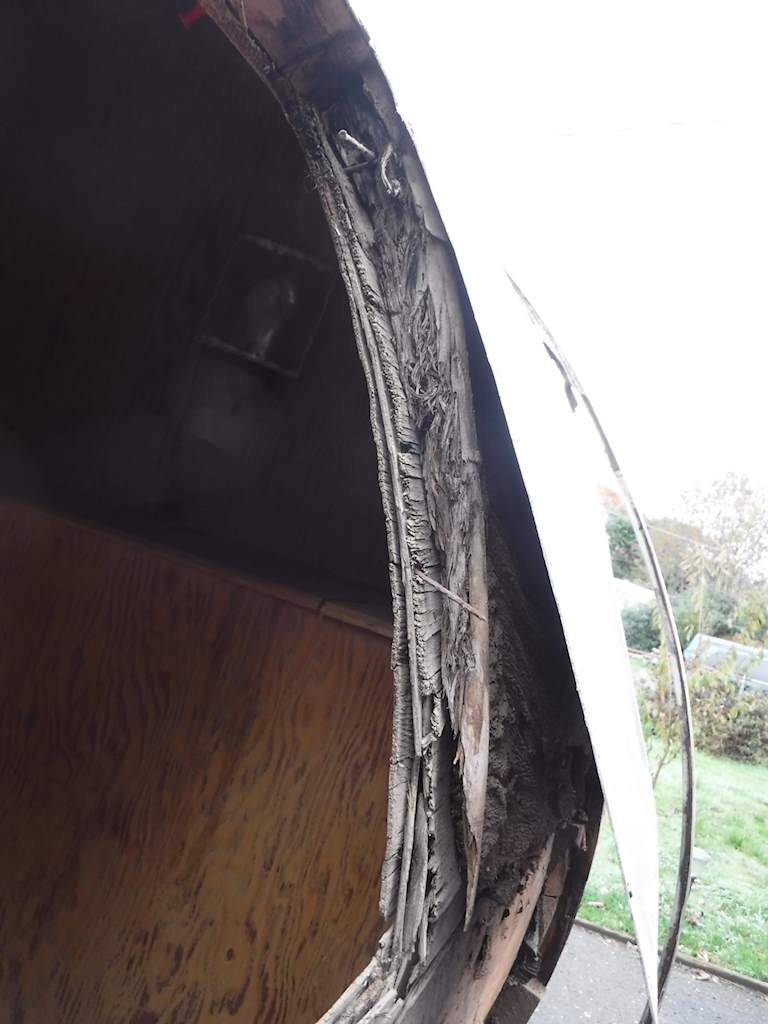
The nails come out fairly easily, so next week, after Thanksgiving, I can start removing panels, replacing damaged or rotten wood, adding insulation and running wires, and putting the panels back on.  Without nails and with proper butyl tape.

November 22, 2015

I made a little progress. Yesterday was largely drizzly and overcast, so I didn’t do much worth photographing.  I took apart the rustiest of the windows, which was the rear.  Looks like this:
DSCF0193 DSCF0194
The screws and nuts were badly rusted.  Some I was able to get apart.  Some broke.  Two I had to cut apart with my high speed rotary tool. I think that what’s left is just barely strong enough to use.  Just a little more and it would be trash.

I cut the wood pieces I need to go around the front and rear windows- those need some curved bits to fit properly.  I also hand-formed some .030″ aluminum sheet to cover (well, I think it will cover properly) the holes on the left and right of the windows, where the wood was unprotected.  Unprotected wood rapidly shows its annoyance by turning to mush. Anyone who has worked on an old boat knows that.

Today was sunny, so I could work on the rooof. I spent something over five hours removing screws from the roof. I’ve never seen so many rusted slotted screws that come out so hard.  Some I am able to unscrew with the cordless drill. Some I can remove with a hand screwdrive.  Most I unscrew enough to grab the head with locking pliers and then remove them that way.  The replacements are going to be hex head stainless.  I’d use torx head if I could get them locally.  Here’s what the top looks like now. This is looking from right front to left rear

DSCF0195

I’ve got the right side done and will do the left on the next good day.  Maybe.  We’ve got visitors for Thanksgiving and need to get ready.


November 20, 2015

I started out with high hopes of getting the roof off today, but it was drizzling until after noon.  So I instead pulled out the two front windows, the rear window, and the bottom rear skin.

Yuch!

Here’s what the wood around the front windows looks like:
DSCF0189

DSCF0188

It seems that as originally built there was wood directly exposed to the rain. It probably had some putty around it, but that’s all.  It’s hard to be sure what was original and what was an attempt by somebody to fix the problems, but this will all need to be replaced.

Same in the back, but even worse.  On the rear window, right side, the wood that used to be there is just gone.  Not even wood pulp left.

DSCF0180

On the left side you can at least see what’s supposed to be there.

DSCF0178


Here’s what the back looks like with the lower skin panel off.  Obviously that all needs to be replaced including the inner wall.DSCF0183I hope tomorrow is clear.

First Partial Day

I didn’t get a lot done today.  The rain is threatening, so after a couple hours I stopped. I got one panel off.  Pretty annoying- the panels are all first nailed around the edges, then screwed.  All the original screws are slotted, which are of course much harder to get off after some rust.  But here’s the construction:

DSCF0154

I’ve read about cellulose insulation but never seen it.  I guess this is it. Pretty awful stuff, and falling apart.  At least it’s easy to remove. I have some polyiso insulation to replace it.  That stuff is outstanding. I got one of the windows out- it came out pretty easily.  All nails of course. But the wood is sound. And the window (with some cleaning, better seals, and some oil) should be fine. Looks like the glass can be replaced by removing a few screws.  I think I’ll put acrylic in the front.  There are a few broken panes, and I might be able to use the glass from the front to replace them.  At least some of them.

DSCF0164

The bottom right front corner is a disaster, but I should be able to fix it without too much trouble.  It’s made of two thin wood strips, and I can laminate something to follow that curve.

DSCF0160

The bottom looks like a layer of either 3/4″ or 5/8″ ply on top of what I think is 3/8 fiberboard.  The fiberboard has no integrity- I can tear pieces off with my fingernail.
DSCF0158

I can’t see the head of that bolt, but there are other bolts where I can see the nut below the trailer frame and they don’t have a visible head.  So apparently the 2×2 that’s attached to the verticals is bolted to the plywood, which is bolted to the frame.  The floor has to go, so I think the replacement will be 3/4 ply” on a 2 x 4 grid with a 1/4″ removable bottom ply. All that encapsulated in epoxy and with polyiso insulation.

I think the sequence has to be:

  • Remove all the windows.
  • Remove the corner molding and roof vents
  • Remove the roof panels, repair rotten wood, insulate, and replace the roof panels.
  • Replace the roof vents using proper butyl tape for waterproofing. Every screw goes on with a dab of silicone to prevent leaks.
  • Remove the side panels and insulation
  • Replace rotten wood on the sides.
  • Remove or cut the nuts off the nuts holding the trailer to the floor and frame.
  • Jack up the now-separated trailer.
  • 4 feet at a time working from the back to the front, remove the floor and replace with new 3/4 inch flooring.
  • When the floor is all new, attach new 2×4 supports.
  • Wire brush the frame and paint.  I’ve used Aluthane with good results, and it should look appropriate.  I think.
  • Lower the trailer onto the frame and insert bolts through the stack.